Wednesday, March 26, 2014

17th Century Hatchets

Being that at least half of my carpentry work is done in front of the public in a 17th century context, it is essential that my tools are as historically accurate as possible. The big problem with this ideology is that historical tools from this era are a little bit hard (aka damn near impossible) to come by, and when we do find them, we try to preserve and study them rather than smash them against pieces of wood.

As a work around, the blacksmiths at the museum reprofile modern axes to better impersonate these actual historical artifacts. My new hatchet started its life as a Wetterlings broad axe (that's right, us badass pilgrims use broad axes as hatchets, but I digress).

Stock Wetterlings Short Handled Broad Axe #190

The pattern that my new hatchet is based on is from Martin's Hundred and dated to around 1621. It was found in the ground along with various other tools, most likely buried there to prevent the native populations from repurposing the metal into tools and weapons.

Archeologist's sketches of a Martin's Hundred hatchet

The Wetterlings head is hack sawn away to the same profile as the Martin's hatchet, removing a lot of the weight from behind the eye and reducing the bit length by several inches.

The hacked up head...luckily this was not my job

Next I reground the bit into a nice fair curve, filed it for a convex bevel, sharpened it with whetstones, and stroped with a piece of leather charged with rouge polish. Finally I helved the hatchet with a white oak handle (remember these are English settlers in 1627, they probably don't know the wonderful qualities of Hickory as handle stock).

The finished hatchet. I like a nice healthy fauns foot for power! 

Overall this is a beefy hatchet with one hell of a bite. You can see how thin the historic hatchet is right in front of the eye, but the Wetterlings is quite thick, giving it much more mass. After four hours of trimming lath, I appropriately nicknamed this hatchet "Wrist Breaker."

Check out all that iron in front of the eye.

In order to protect the edge, and lessen the amount of sharpening I need to do, I made a nice wooden blade guard (note that this is not historically based on anything).

An ash blade guard with some hemp rope to hold it on.


Sunday, March 2, 2014

Failure is not...not an Option

Those of you that have been following my blog for a while have noticed that I have had several cliff hangers that have not been addressed. I would like to blame these loose ends on relocating for my new job...but mostly it is because I am a lazy blogger. So here is my small peace offering for those that have been waiting anxiously (but not really) to find out how my basket weaving attempt ended.

Although I started well enough, things soon turned south as I went to start the sides of the basket. Before this debacle, however, I first collected some cherry shoots from my pseudo-coppice in the Alden House garden.

Two cherry faggots for the sides

The next order of business was to do some research. I found a couple of helpful articles and videos online that are worth taking a look at, even just for pure unadulterated curiosity. After picking up what I thought would be helpful tips I got back to work. I sharpened the spars, so they jam into the weavers better, and inserted 12 of them into my basket bottom.

Sharpened spars

In case you aren't familiar (like me) with basket weaving, 12 is a very poor number for spars. In order for the weavers to alternate over-under-over-under continually as you spiral around the basket you need an odd amount of spars...and through four years of mathematics and engineering I am almost positive 12 is not an odd number. Unfortunately I did not know this fact when I started this basket.

Once the spars are in, it was time to bend them to set the hard corner between the base and sides of the basket. I tried several methods to achieve this bend, and none of them worked very well. Boiling made the cherry brittle, bending without modification just fractured the stock, twisting while bending only rent the fibers asunder, so I found the best (out of the horrible solutions) was to cut a small notch through half the thickness of the shoots which helped reduce fracture. This is probably a good reason why you don't see a lot of cherry baskets.

Spars inserted and bent up the sides

Finally I started winding the weavers over-under-over-under-over-over; yup that even number of spars bit me in the ass.

Oh, and another good tip that I found AFTER botching this basket, is that you can reverse the direction of weaving when you start the sides, this reversal makes the basket stronger (don't ask me why).

As can be seen...the sides didn't shape up very well

After a couple hours of trying to weave the sides, unwind them, and try again, I finally surrendered and admitted to myself that this basket was not meant to be. Since this attempt I have done even more research, including videos, books, and blogs, and I have been looking into some basket weaving courses locally. Hopefully my next attempt will be a little more inspiring, but this is The Clueless Woodwright, not 'The Has Everything Figured Out Woodwright' (that just doesn't have the same ring).

Thursday, February 27, 2014

A flattering angle

Those in the know are aware that The Boss is a photographer. If you are not in the know you should go check out her site RIGHT NOW because my handsome mug is plastered all over her most recent post.

We were raising some principle rafters on a timber frame that we have been working on this winter so I called Amanda to get some professional documentation. She puts my pictures to shame...but that really isn't saying much seeing as I use my cell phone with a scratched up lens.

Here are some more pictures she took while visiting me for lunch at work when I was hewing the purlins for the aforementioned timber frame; she is very talented.

That is Steve's broad axe in the foreground, with his authentic pack basket

Tools of the trade

Peeling off the bark helps snap and keep a more precise line.

Using a plumbet, old school style

Here is one from me in my work duds looking like a certified bad ass.


Usually I don't get any pictures of me actually doing work, because I don't use a tripod, so it is nice when she stops by to take some candids of me getting my woodwright on.

PS. My blog recently went over 10,000 views...crazy, and I wasn't even there to see it tick over. Looks like I will have to be more vigilant when it hits 28,008, and then stand on my head (you'll get it if you are a math nerd).

Saturday, February 15, 2014

Wood, the element

Ever wonder the Janka hardness of Sapele? 6,280 N
How about the modulus of rapture of Blue Ash? 95.2 MPa
Maybe the radial shrinkage of Mango? 3.6%
Perhaps the scientific name of Dogwood? Cornus florida

You are probably thinking that I am some kind of Idiot Savant, or have waaaay too much time to do research on the internet. The real truth is that I found a fantastic website, The Wood Database, that catalogs all the properties of all species of wood, or at least all the wood that I can think of. This information is then put into a periodic table-esque collection of physical properties that is easily searchable.


Strength, weight, shrinkage, rot resistance, workability, odor, common uses, allergies, price, color, etc, etc, etc. This site literally lists every fact about most woods, even information that you might not need to know, and there are pictures to boot!

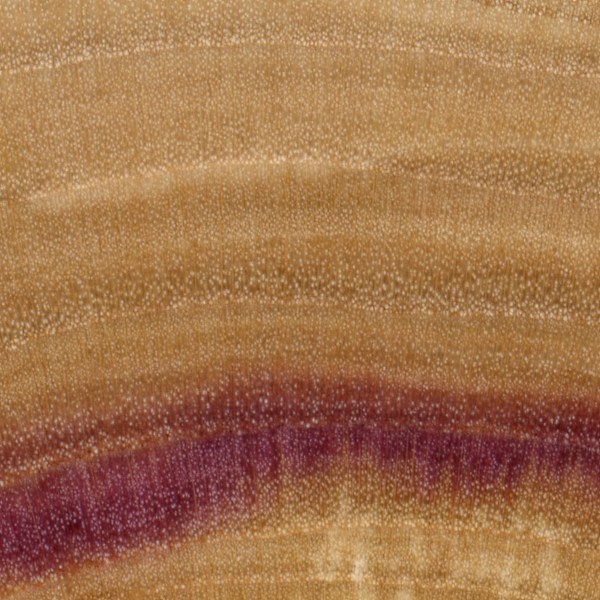
Ever seen the end grain of Lilac?


Lilac end grain magnified 10x

Want to know what sealed Sissoo looks like? This site has it!


I don't know what Sissoo is, but here it is sealed.

Just don't let your significant other catch you drooling over the pictures on your computer screen, they might get the wrong impression.

PS. You're welcome.

Tuesday, February 11, 2014

Coarse, Medium, and Fine

While hewing some perlins, I noticed the (or at least my) three stages of hewing; coarse, medium, and fine. Pretty cool.


Saturday, February 8, 2014

On second thought, maybe I'll move to Finland

In a previous post I said that if my current job didn't work out I was going to move to Germany and become a Bavarian logger. But after perusing the internet I came up with another great video. (Link for phone and tablet users)


I want to join this crew of Finnish carpenters so bad it hurts.I could go on and on about the things I found fantastic about this video, but I will stick to the high notes.

1. Hewing an entire gable end wall before I die MUST happen.
2. I need to start cutting joints with nothing but a hatchet.
3. How cool are pegged floating floors?
4. I am going to Finland to get me one of those sweet axes!

P.S. Seeing as I have crazy O.C.D., I couldn't stop thinking about those great Finnish axes. So I did some research and found that there are pretty much two ways to get your hands on one. The first way - find a friend in Finland and have them go to any flea market and pick up a great vintage Billnas for almost nothing...and then pay a fortune in shipping costs to send it over state-side. The second way is to figure out a way to buy one from John Neeman Tools (see blog post here). It might be easier finding a friend in Finland, and I have a feeling that it would be a lot cheaper too.

P.P.S. I think it is poor blogging etiquette to have the P.S. longer than the blog.

P.P.P.S. Or having three post scripts.

P.P.P.P.S The End


Wednesday, February 5, 2014

The Sweet Smell of Success

After many broken spoons, and plenty of...explicit words, I finally finished my first spoon. The proportions are a little off, the whole thing twisted like a corkscrew when it dried, and the bowl is a tad bit lop sided, but I feel like the proud parent of an ugly baby.

I chickened out from adding chip carving to the handle.

This spoon is made from a piece of apple wood that was gifted to me from a visitor to the museum. Apple is wonderful to work with as long as it is wet. I treated the spoon with some Walnut Oil which really made the heartwood pop.

I left the knife marks on, I think it gives more character.

I learned a few key things in my quest for a wooden spoon:
1. These little buggers are WAY more complex than they first appear.
2. Don't try for perfection, that is what factories are for.
3. Wood selection is paramount. Fruit and Nut woods are preferred, any sort of ring porous wood is abismal.
4. Consider me addicted.

I really like the side profile.

Onwards and Upwards!