Basically, a biddle is a short ladder with some iron hooks that pierce through the thatch and hook onto the lath on the roof. This gives a nice versatile working platform that you can move around at your leisure. I started with a bow of Sassafrass and hewed it on four sides. Working such a small piece of wood was a nice change of pace. I didn't even score to my line, just started hewing with a hatchet, and within the hour I had a relatively squarish timber.
 |
| I love the sweet smell of Sassafras while it is being worked |
Next, I bored holes through the piece. I think I did every 12", but it is more important to be consistent than to hit an exact number. These holes will accommodate the rungs of the biddle, and are about 7/8" diameter. It is best to auger the holes before ripping the stiles apart, that way you don't have to bother with that shop math that always seems to go wrong to line up all the holes.
 |
| Two squares keep me boring plumb |
Before the comments start flowing in, I know a screw auger is not 17th century accurate, but unlike the Brewster Chair, no one will know I used it because these are through holes. Sometimes efficiency trumps authenticity, especially when no one is the wiser (I think I just blew my cover).
Next was ripping the small timber into stiles. Luckily I learned the Tao of Saw Sharpening from the always helpful Saw Wright, Matt Cianci, so I had a newly sharpened rip saw waiting in the wings.
 |
| Using a wedge keeps the piece from pinching |
This biddle will be used on roofs up to 30 ft in the air, so I wanted it to be as robust as possible. This lead me to put mortised rails on the top and bottom to hold the whole thing together. I chiseled the mortises with a 3/4" chisel, and cut the tenons to fit.
 |
| It is easier to fit the tenon to the chisel, than fit the chisel to the tenon |
Keeping with the "I don't want to fall off the roof and die" mentality I also draw bored the mortise and tenons for a nice tight assembly. For the pegs I used bone dry riven white oak and noisily banged it through a dowel plate.
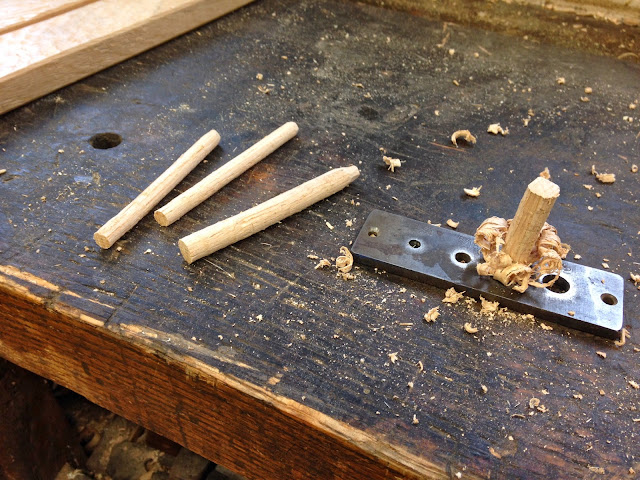 |
| Dog holes in the bench are perfect places for the pins to be blasted through the plate |
Remember my note on screw augers above? Yeah...refer to that in regards to dowel plates.
In addition to the draw bores, I also made all of the rungs with stopped shoulders and tiny little wedges to secure them into the stiles. Note to self, there is a reason they didn't wedge ladder rungs...it makes construction about twice as long. Now all I needed was a mallet and earplugs to knock this bad boy together.
 |
| Tap, Tap, Tap |
I got a little carried away knocking the whole assembly together and it fell right off the bench, but it didn't self destruct, so that is reason to be happy.
 |
| It is easy to get giddy when approaching the end of a new, exciting project |
The last piece to be dealt with was making the tiniest stupidest through tenons I will probably cut in my life. These were for the iron hooks that our blacksmith made for me. The mortises were 3/16" x 3/4" and went through the whole 3-1/2" piece of Sassafrass, and they had a stepped shoulder to boot.
 |
| A tight fit now ensures a tight fit later |
Clenching the biddle hooks is pretty much the same as clenching nails...except you use a sledge hammer and swing as hard as you can.
 |
| There is a fine line between clenching and splitting with these bad Larrys |
Finally, I step back and admire my hard work, not bad if I do say so myself. Total hand tool construction, all the way from felling the tree with an axe. Next on the list of thatching tools is a biddle (that is not a typo...but it IS a story for another time).
 |
| I need to get The Boss to take better pictures for me... |


